We’ve been eating a lot of fermented vegetables lately. We started with kimchi (Homemade Kimchi, Jun 26, 2011), but lately we’ve been fermenting our vegetables in a less spicy style that is normally used for sauerkraut.
“Sauerkraut” means “sour cabbage.” We are not huge cabbage fans, so we often substitute other vegetables. We’ve had good results from Daikon radish, red radish, carrot, celery, and cabbage; the only vegetable we didn’t care for was parsnip.
This is a really simple procedure – mix salt, water, and vegetables with a few spices; leave in a cool, dark sealed container for 7-10 days; eat.
For safety, the key is to give enough time for the water to become acidic. Wikipedia explains the evolution of the bacterial population:
The fermentation process has three phases. In the first phase, anaerobic bacteria such as Klebsiella and Enterobacter lead the fermentation, and begin producing an acidic environment that favours later bacteria. The second phase starts as the acid levels become too high for many bacteria, and Leuconostoc mesenteroides and other Leuconostoc spp. take dominance. In the third phase, various Lactobacillus species, including L. brevis and L. plantarum, ferment any remaining sugars, further lowering the pH. There are unpasteurized sauerkrauts on the market. Properly cured sauerkraut is sufficiently acidic to prevent a favorable environment for the growth of Clostridium botulinum, the toxins of which cause botulism.
Klebsiella and Enterobacter are potentially pathogenic bacteria, but the later Leuconostoc and Lactobacillus species are probiotic. So the more acidic the water, the better the mix of bacteria.
Another good tactic is use predominantly low-calorie vegetables. Keeping sugar levels low will help keep the yeast population down.
First Batch: Daikon radish, celery, carrot
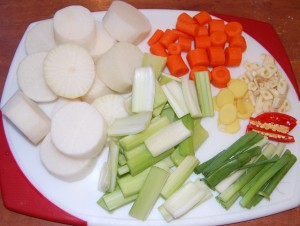
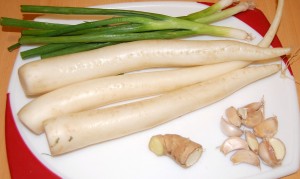
Here were the raw materials for one batch:
We could have cut the white Daikon radish pieces smaller, but this size did fine: by day 7 they were softened all the way through.
Sea salt, ginger, garlic, and peppercorn are seasonings we consider essential; green onion and red pepper have worked for us as well.
You’ll need a large glass or ceramic container that seals. If it is glass, keep it in a dark cabinet while fermenting to avoid light exposure. We like to look at ours in progress, so we bought glass containers.
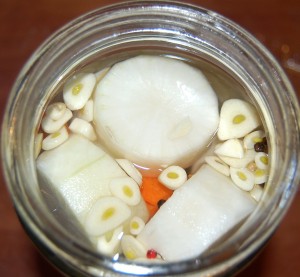
Fill the glass container about 80% full with diced vegetables, then cover with water so the container is 90% full. Add enough sea salt that the water tastes salty, but not undrinkably so. Also add the other seasonings – ginger, garlic, peppercorn, and any others you choose.
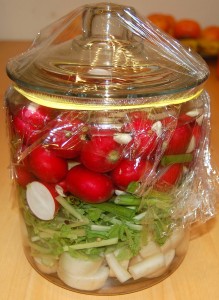
The container will now look like this:
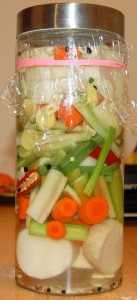
Now it has to be covered with an air-tight seal. We placed plastic wrap over the top, wrapped a rubber band around the jar, and then sealed the lid over the wrap:
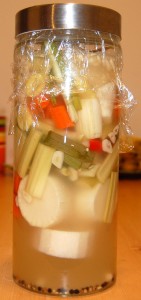
After a week it will look like this:
Note how cloudy the water has become.
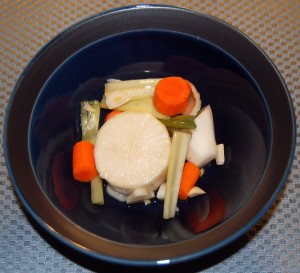
After a week you should be able to start removing vegetables to eat. Here are some vegetables:
It’s also a good idea to remove the cloudy fluid and drink it. This makes a great “soup” or beverage along with your meal.
As you remove fluid, add water and sea salt to replace what you took. When you run out of vegetables, add a new batch of diced vegetables to the old fluid and let it ferment for a week.
Second Batch: Daikon radish, green onion, and red radish
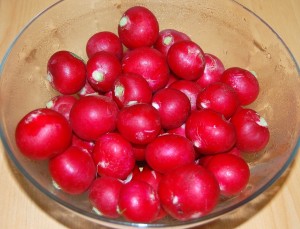
This first try was so successful we bought a larger glass container and made another batch, this time including red radish. Ingredients:
Here it is ready to go into a dark cabinet for fermentation:
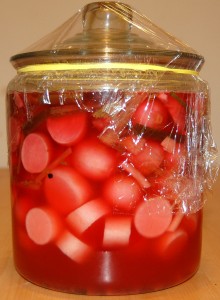
And here it is a week later:
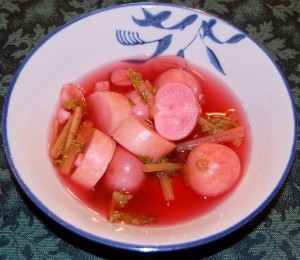
All the red skin pigment has come off the radishes and into the fluid. Here is a bowl of vegetables and fluid:
We’ve been eating two bowls a day, one at dinner and the other at breakfast or lunch.
Other Tips
Try to keep the fermentation jar sterile. We replace the wrap every time we open the container, and keep the lid region dry at all times: if any fluid spills on it as we take vegetables out, we dry the top of the jar with a paper towel. (Bacteria need moisture to thrive.)
If you have concerns about the bacteria on your vegetables, sprinkle salt over them and let them sit for a bit, then rinse the vegetables before dicing them and adding them to the container. This salting will help sterilize the surface a bit.
Conclusion
Even if you don’t like vegetables, you’ll probably like this. Fermented vegetables are surprisingly tasty. Moreover, the fluid is also very tasty. It makes a healthful hydrating beverage, and a great accompaniment to a meal; the acidic fluid helps clear the palate and improve the taste of foods.
We couldn’t be happier with our vegetable fermentation. It makes vegetables taste great, provides us with helpful probiotic flora and lactic acid, and is exceptionally easy to prepare. No cooking necessary!





Recent Comments