Yearly Archives: 2011 - Page 9

Dong Po’s Pork

Su Dong Po is one of the two or three most beloved poets in Chinese history. So famous was he that the dish he loved most was given his name: Dong Po’s Pork.

It’s quite a treat: you’ll be unsure whether you’re eating the entrée or the dessert. Strangely this dish, one of the most popular in Chinese cuisine, rarely appears on the menu of Chinese restaurants in the U.S.

Preparing the Pork Bellies

Dong Po’s Pork is basically a high-class way of cooking pork bellies – the uncured precursor to bacon.

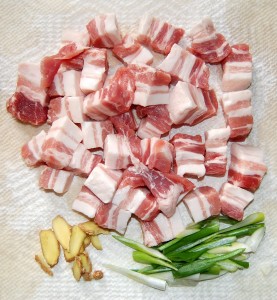
Buy the pork bellies in thick slices – at least a half-inch thick. Cut them into cubes about 1 inch on a side. You’ll also need a few slices from a ginger root and scallions:

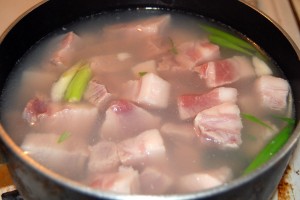
The first step is to boil a pot of water. Add the cubed pork bellies, ginger, and scallion to the boiling water.

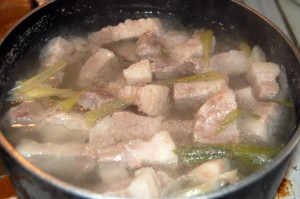
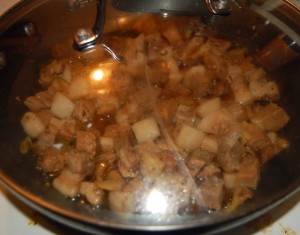
Boil for 30 minutes, it will look like this:

Drain the liquid, keeping the solids.

This boiling process removes unpleasant pork flavors, and leaves the pork with a very mild fatty flavor.

Preparing the Sauce

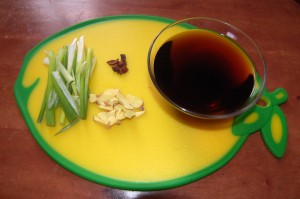
While the pork is being boiled, prepare the cooking sauce. Mix in a small bowl about 2 tbsp soy sauce – we use Kikkoman Teriyaki Marinade and Soy Sauce, but any naturally brewed soy sauce can be used – and a half cup of wine – we used Riesling since we frequently drink that, but any wine will do. Also, cut more ginger and scallions. The traditional Chinese recipe calls for star anise as well:

If whole star anise is unavailable, you can find ground anise or Chinese “5-star” spice in your supermarket spice aisle. However, it would also come out fine if you dispense with the anise; the pork, soy sauce, wine, and caramelized sugar provide most of the taste.

Traditionally, the remainder of the cooking would be done in a Dutch oven or similar pot that retains heat and can be tightly sealed to keep in steam. However, we’ll use a wok.

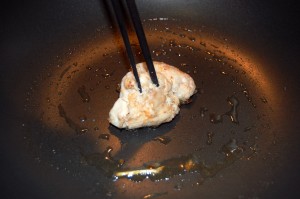
In the wok, warm some cooking fat. You can use any oil you like – olive oil or coconut oil are fine. We have been using beef tallow lately – here we are melting some fat from a block of beef fat:

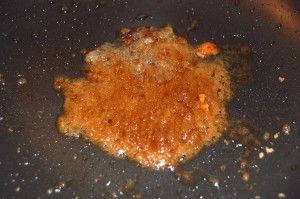
Once the oil is warm, add about 2 tbsp rice syrup. Stir as the sugar caramelizes. It’s ready as soon as bubbles appear — about 30 seconds:

We have adopted rice syrup as our sweetener of choice. It is a zero-fructose sweetener, and we like that it provides glucose calories along with its sweet taste: it seems the body evolved to expect sweet tastes to be followed by an infusion of sugar, since zero-calorie sweeteners trigger insulin release. We like our food to fit the body’s evolved expectations. (The traditional sweetener is smaller amount of brown sugar.)

Caramelizing sugar will create some advanced glycation endproducts (AGEs), so this dish is not perfectly healthy – but it is healthy enough for us.

Completing the Dish

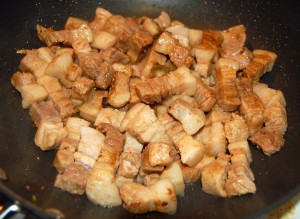
Immediately after the rice syrup begins to caramelize, and before it burns, add the cooked pork to the pan and stir to coat the pork evenly.

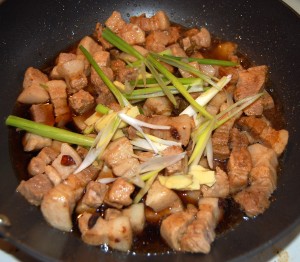
Then immediately add all the other ingredients.

Cover, briefly raise the heat to bring the wine and soy sauce mixture to a simmer, then lower the heat and let it simmer covered for 30 to 60 minutes.

The object here is to steam the pork and let the sauce flavors combine with the pork. The longer you steam it, the softer the fat becomes and the more it melts in your mouth.

Every 10 to 15 minutes, uncover and stir. If your soy sauce was not salty enough for you, you can add a bit of salt while it is cooking.

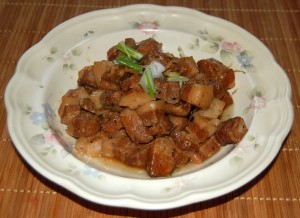
By the time you’re done, there will be only a little liquid left. Transfer to a serving bowl.

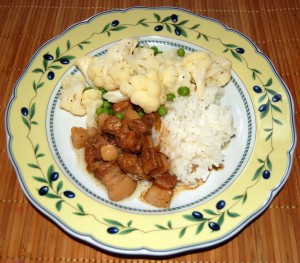
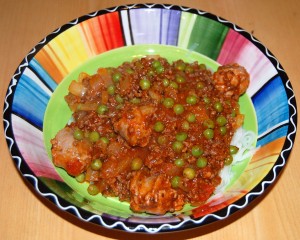
Dong Po Pork is fantastic with rice. Here’s how we ate it:

Enjoy!

Cranky Grouch’s Spaghetti

We have a food emergency among our Italian fans.

erp’s husband, the “Cranky Grouch,” has been doing well on our diet but retains a “crazing” for pasta:

He’s lost 30 lbs without trying very hard and gives in to the crazing (not a typo) for pasta, but he’s cut down drastically on bread and desserts, so he gets full credit. He’s of Italian background and can’t be expected to never again eat his beloved macaroni.

Unfortunately, rice noodles haven’t pleased him:

Paul, My husband doesn’t like rice noodles. We’ve tried several varieties and I have to admit, I don’t like them much either, but then, I’m not a pasta fanatic.

I’d rather have tomato sauce, known around here as gravy, over plain white rice — to him, it goes against the nature of all things holy.

Mamma mia! Tomato sauce over rice – we can do better than that.

Franco also misses his pasta:

Man, I miss carbonara, you can’t believe how difficult it is to not eat pasta as an italian! And nobody tell me rice noodles is a substitute!

We sympathize with these complaints because it took us a while to figure out how to make rice noodle dishes.

At first we struggled:  some brands just didn’t taste good, and it was so easy to overcook the delicate noodles into a soft and mal-textured goo. But now that we know what we’re doing, we much prefer rice noodles to wheat. Now when we taste wheat noodles, they seem tough — we don’t miss them a bit.

I know it will be hard to persuade our Italian readers that rice noodles are better than wheat … but maybe we can help them enjoy their purgatory a bit better.

So, here it is: Cranky Grouch’s Spaghetti. Our best shot at winning over a skeptical Italian. (Franco, sorry, this one is Bolognese. Perhaps we’ll do a carbonara later.)

Rice Noodles

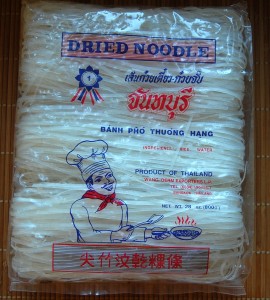
First, there are many different brands and different sizes of rice noodles. It took some searching, but we now have a favorite. It is a Thai brand:

We especially like this thickness: it cooks evenly but not too quickly. We use about one-third of a bag each time in order to serve four people.

There are a few tricks to cooking rice noodles. First, they cook very rapidly – much faster than wheat. And you want them al dente, a little chewy, not soft. So you have to be fast.

Bring a pot of water to a boil. When it is actively boiling, add the rice noodles. Cover briefly, until it returns to a boil. Then immediately take the lid off and use chopsticks or some other implement to stir and separate the noodles from each other.

Taste the noodles to judge when they are done. They should be chewy, neither soft nor crunchy. Cooking time varies with the thickness of the noodles, but for these it is about seven minutes.

As soon as they reach this al dente state, immediately empty the pot through a strainer, return the noodles to the pot, and cover them with cold water momentarily to cool the noodles and stop them from cooking further. Pour them through the strainer again.

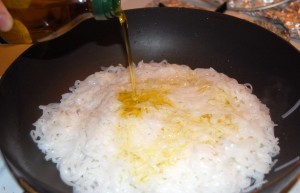
Now transfer the noodles to a container – we use a wok – and add some olive oil. Coating the noodles in oil will prevent them from sticking together. Mix the oil and noodles thoroughly.

These oiled and cooked noodles are ready to eat, but can be stored in the refrigerator if you wish, and re-heated in a microwave for eating.

Bologenese Sauce

You can prepare the sauce simultaneously with the noodles. I’m sure everyone is familiar with how to make this sauce, so I’ll just share what we do.

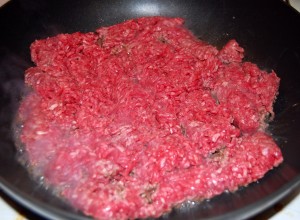
We start by browning some ground beef. We find the natural fat from 80% ground beef provides just the right amount of oil, so we neither add extra cooking oil nor drain away the fats after cooking the beef.

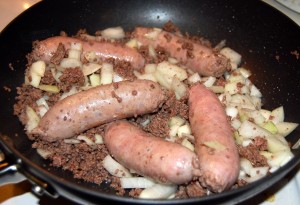
We’ll also include some sweet Italian sausage, to vary the taste a little. We’ll be slicing the sausage into bite-sized chunks but we find that can be done just as easily after the sausage has cooked a little, so to speed things along we’re throwing the whole sausages into the beef along with some onion. We like to stir-fry the onion about 2 minutes before adding the sauce.

We use store-bought spaghetti sauce – in this case, a Trader Joe’s marinara sauce – which saves some time. At the same time we add the sauce, we start pulling out sausages and slicing them:

The partially cooked sausage slices are then returned to the pot to finish cooking. We also add salt and pepper at this point, and usually (but not tonight) spinach.

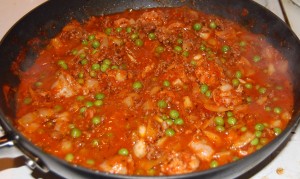
When the sauce ingredients are well cooked, we add some frozen pre-cooked peas.

We stop cooking about 2 minutes after adding the peas.

Now just put some of the rice noodles in a bowl and ladle sauce on top. The hot sauce will warm the rice noodles.

There you are! An easy spaghetti dinner that, we hope, will please even the Cranky Grouch.

About Green Tea

Erich asked what kind of tea we drink. Tea is a subject dear to our hearts, so we thought we’d discuss it today.

First, some background. Over at Planet Tea they have a useful flowchart describing how different kinds of tea are made:

The critical step is fermentation, which oxidizes the leaf and turns it black. Green tea is unfermented; oolong (wu long) is partially fermented; and black tea (in Asia, “red tea”) is highly fermented. Black tea has a longer shelf life than green tea.

Growing region matters. Mainland China is by far the world’s largest producer of tea, but China is extremely polluted and we would not trust Chinese tea. Japan and Taiwan both produce excellent green teas; we drink tea from both countries.

Taiwanese Tea

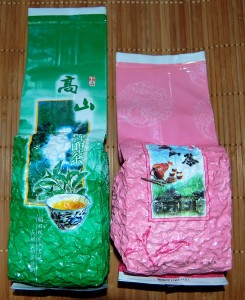
The Taiwanese teas with the highest reputation are “high mountain tea”; these are grown at high altitudes above the smog. We drink both green and oolong high mountain teas from Taiwan. Ours come in 300 g vacuum-packed packages:

The one on the left is green tea, the one on the right an oolong; both are “high mountain” teas. Each package weighs 300 g. We use about 4 g (20 leaves) of tea per day, and so a package lasts about 3 months. A single 300 g package of high quality tea may cost $100, so the total cost is about $1 per day; but multiple cups of tea may be obtained from each day’s tea.

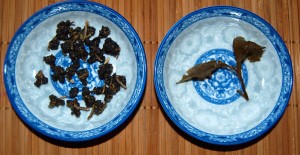
The leaves are rolled and dried during processing, and shrivel to a very small size, then re-expand when placed in warm water. Here is what they look like:

Left — rolled and dried leaves, ready to make tea. Right — an opened bud, after being used.

The opened bud on the right gives you a good idea what the leaves look like on the tea tree. Workers pluck these small buds from the trees and place them in baskets; the finest buds are plucked early in the spring.

Aside: Some Equipment

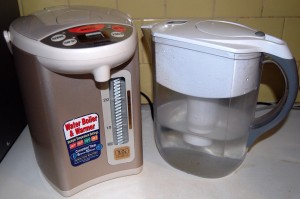
For best results it’s important to use pure water. Tap water produces a discolored tea with a foul taste. We get good results filtering our water in a Britta filter. In fact, we judge that it’s time to change the filter when our tea changes taste. The Britta instructions recommend changing the filter every two months, but we find it needs to be changed every month if our tea is to retain its flavor.

If you make tea often, it’s helpful to have a hot water dispenser, like this one from Zojirushi, along with your Britta filter:

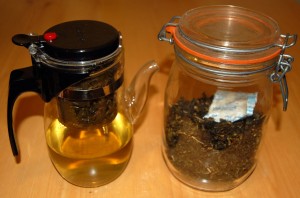
Tea is best when the leaves have steeped for about 5 minutes. Since you may take much longer to drink the tea, it’s important to steep the tea in a separate container from your drinking mug. Here’s what we use:

Left — An Asian “busy person’s” tea-pot. A container at top holds the tea leaves and enough water to make a single cup. When the leaves are done steeping, pressing the red button drains the water into the pot, after which it can be poured into a mug. Right — an airtight container we use to store our tea leaves.

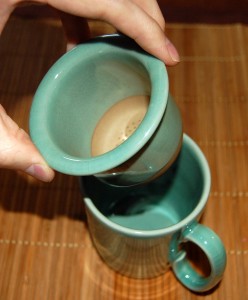
Alternatively, Asian supermarkets sell teacups in 3 parts — a mug, a container to hold the tea leaves, and a lid to cover while the tea is steeping. They look like this:

The tea leaves go in the removable upper part; when it is removed the tea drains through the holes in the bottom into the mug. After drinking a cup, the upper container with the leaves can be put back in and more hot water added to steep another cup.

Making the Tea

To make the tea, place 15-20 rolled buds into the leaf container, and add hot (near boiling) water. Taiwanese green tea typically requires 3 to 5 minutes to steep, and the tea is actually yellow, not green.

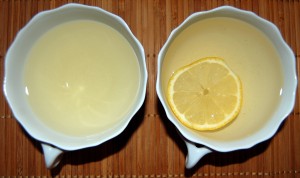
Shou-Ching likes her tea prepared the classic way. Add hot water to new leaves, and drain it after 30 seconds as the leaves just begin to open; this is thought to clean any impurities. Then add new hot water, let it steep 3 to 5 minutes, and drink this second batch. This produces a delicate, light yellow tea. Paul lets his steep a bit longer to make a slightly darker tea and adds a lemon slice. Here is what they look like:

Japanese Green Tea

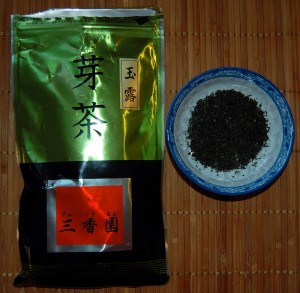
Japanese green tea is made with a different process; the tea leaves are usually crumbled, not rolled. Here is what they look like:

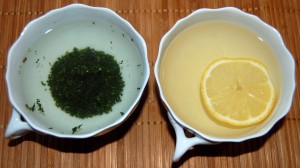
These crumbled tea fragments are placed directly in the teacup and produce a green-colored tea. Yes, the tea leaves can be swallowed. Here is a comparison of a cup of Japanese green tea (left) with a Taiwanese green tea (right):

Obtaining Fine Teas

We are regularly sent tea by relatives and friends in Asia, so we haven’t had to shop for tea in the US.

However, Google searches turn up a number of vendors. “Tea from Taiwan” has some good-looking teas. Reader Gary Wilson kindly wrote to recommend Upton Tea Imports. And here are some Amazon links, not all currently available:

At roughly $1 per day, fine tea is not inexpensive. However, many people spend as much or more on coffee. Paul makes 5 or 6 cups per day from a single 4 g set of leaves, so the cost averages to only $0.20 per cup.

If your only knowledge of tea is derived from the Lipton Tea Company, we very much recommend that you give fine green or oolong teas a try! You might find tea more pleasant and enjoyable than you imagined.

Herb-Encrusted Salmon Cakes with Lemon Juice

We’ve been looking at cookbooks lately. We recently acquired The Garden of Eating by blogging stars Chef Rachel Albert (The Healthy Cooking Coach) and Don Matesz (Primal Wisdom).

The first thing one notices about this book is the impressive amount of effort that was put into it – 7 years, I’m told.  At 8.5” by 11”, 582 pages, it’s full of great recipes. Most pages present a single recipe plus variations.

The Garden of Eating synthesizes Paleo dieting with the foodways of traditional cultures. It begins with a discussion of Weston A Price’s survey of traditional cultures. From the Perfect Health Diet point of view, there are a few missing ingredients. There are recipes with potatoes or sweet potatoes, but no rice or taro. There are recipes with butter, but no cream. Still, potatoes and butter are a big step forward over some Paleo meal plans!
There are plenty of great dishes. We looked first for recipes with key Perfect Health Diet foods:

  • Salmon and beef are favored in our diet for their low omega-6 content;
  • Coconut milk and oil are favored for their ketogenic short-chain fats;
  • Lemons are favored for reasons I’ll discuss in an upcoming series on dietary ways to enhance immune function;
  • Herbs like oregano are favored for their antimicrobial activities in the gut.

We chose a recipe, “Herbed Salmon Cakes with Citrus,” that has a lot of these ingredients. Here is how we made it.

The Recipe

We doubled the size of the recipe, from 2 pounds salmon to 4 pounds, because we had a few college students at home for the holidays.

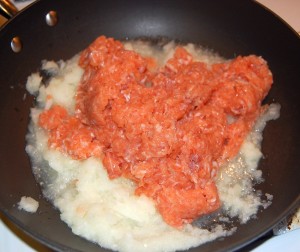
The recipe begins by pulverizing the fish in a food processor and combining it other ingredients in a bowl. We used a wok and here is the salmon with onion:

Other ingredients include fresh parsley leaves, minced celery, grated carrot, eggs, minced dulse leaf, herbs (basil, rosemary, thyme, oregano, lemon pepper), lemon zest, some starch, and some broth.

We made two substitutions: for the starch we used tapioca starch, while the recipe calls for shan yao, arrowroot starch, or powdered rolled oats; and we used lemon juice in place of the broth, where the recipe calls for chicken broth or filtered water.

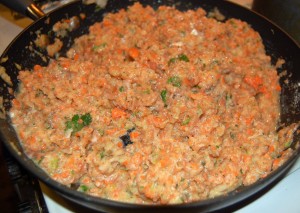
Here are the ingredients mixed in our wok:

The next step was to divide into portions, form into balls, and press into patties. The patties are then covered and refrigerated overnight, or at least for several hours.

The recipe calls for lining a 13x9x2 baking pan with unbleached parchment or using muffin tins, and arranging the patties on a lightly oiled surface. We used aluminum foil on a cookie sheet and greased it with butter:

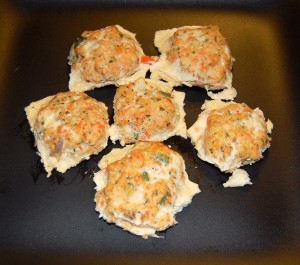
We cooked for 15 minutes at 350ºF until the patties were opaque throughout. Here’s how they came out:

It appears our mix was a little too watery and bled a bit. Maybe the tapioca starch isn’t right for this recipe; or maybe we didn’t use enough seaweed. One of the variations was to replace the dulse with sea salt; we had a shortage of dulse and forgot to put in the sea salt, so perhaps that was the cause.

No matter; it tasted great. Here it is on a serving plate:

The recipe suggests dipping the cakes in one of the cookbook’s many sauces: Cajun Ketchup, Better Barbecue Sauce, herb infused Mayonnaise, or Tahini Tartar Sauce.

We found the cakes to be addictive:  the more you ate the more you wanted another.

There’s a lot to be said for this recipe, apart from its healthy ingredients. The marinade takes away most of the fishy flavor, and the herbs cover the rest, so this may be palatable even to those who dislike salmon. Also, the cakes are a very portable form of salmon, easy to pack for lunch at work; they can be eaten as finger food.

Conclusion

We give two thumbs up to the recipe and the cookbook. Here’s a link to its Amazon page: