Category Archives: Food - Page 3

Okonomiyaki (Japanese pizza-style pancake)

KH left a note on the Recipes page about Okonomiyaki, a Japanese pancake. Our 17-year old niece Seo Yi, who is visiting from Korea, said, “I know how to make that!” We decided to give it a try.

In Asia, pancakes are eaten as we eat pizza or omelettes – as an all-purpose meal that can have an assortment of ingredients. Feel free to substitute ingredients at will; but this assortment worked very well for us.

Ingredients

The only unusual ingredient you need is yamaimo, the Japanese mountain yam. Yamaimo is also called nagaimo (or two words, yama imo or naga imo); or, can be called Chinese yam or Korean yam or even “slimy potato.” When grated, yamaimo releases a sticky liquid that helps the pancake stick together.

The ingredients may be divided into three groups. The first group makes a batter. We recommend:

  • 100 g (2/3 cup) gluten free flour
  • 1 tsp baking powder
  • 100 ml (1/3 cup) bone broth
  • 2 eggs
  • Yamaimo (Japanese mountain yam)

The second group provides the vegetables and meats or seafood that make it a meal. We recommend:

  • cabbage (2-3 leaves)
  • green onion (2-3 stems) or onion (1 medium)
  • shrimp (5 large)
  • scallops (6 medium)
  • shiitake mushrooms (6)
  • sweet pickled ginger (optional)
  • salt and pepper

Finally an assortment of toppings are added either during cooking or after cooking is done. We recommend:

  • bacon (added during cooking)
  • sour cream (added after cooking)

Other sauces — okonomiyaki (Chuno) sauce, spicy (Sriracha) sauce – and toppings (eg, dulse or bonito flakes) may be added to your taste. We wouldn’t go out of our way to pick up the Japanese sauces; but we consider the extra fat from the bacon and sour cream to be important, as the brings the macronutrient proportions in line with PHD recommendations and improve the taste.

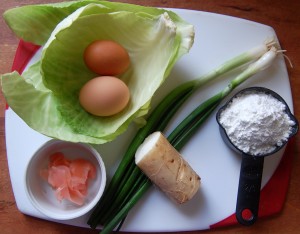
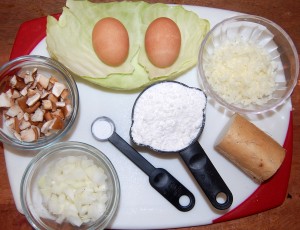
We made several batches with slightly different sets of ingredients. Here are a few pictures of non-meat ingredients:

Cabbage leaves, eggs, green onion, gluten-free flour, yamaimo section, sweet pickled ginger..

Cabbage leaves, eggs, grated mozzarella cheese (as we mentioned, you can add almost any ingredient), yamaimo, gluten-free flour, baking powder, onion, shiitake mushroom.

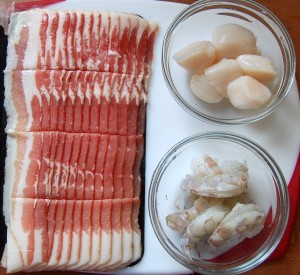
And here are the meats we favor – bacon, scallops, and shrimp:

Preparation

Mix the gluten-free flour, baking powder, bone broth, and eggs in a mixing bowl. Peel the Yamaimo and grate it directly over the mixing bowl, releasing its sticky fluid into the batter. Mix well.

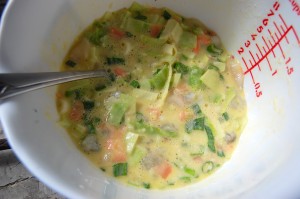
Cut the vegetable and meat ingredients into small pieces and mix into the batter. It will start to look like this:

These ingredient amounts will make enough batter for one very large pancake (filling a wok or griddle) or two smaller pancakes.

Warm a wok or griddle at medium heat and add a tablespoon of butter to grease the pan. Pour in the batter and reduce the heat to medium-low.

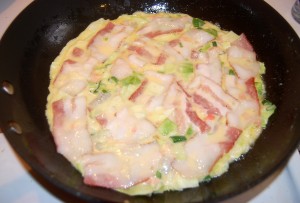
A large pancake will require ten minutes per side at medium-low heat, smaller pancakes will require about five minutes per side. While the first side is cooking, lay bacon over the top of the pancake and add some batter over the top to help seal the bacon in:

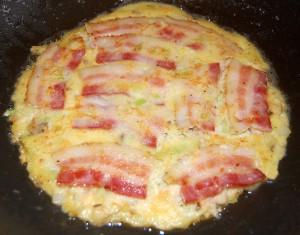
When the first side is sufficiently cooked, flip the pancake and cook the other side. Here is a smaller size pancake – note that it doesn’t fill the pan:

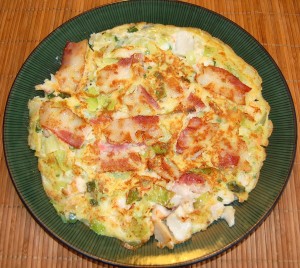
When finished, the large pancake looks like this:

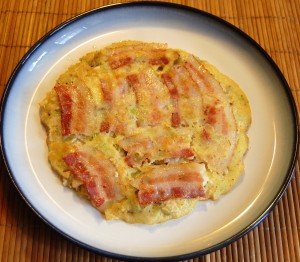
Here is a smaller pancake on a serving plate:

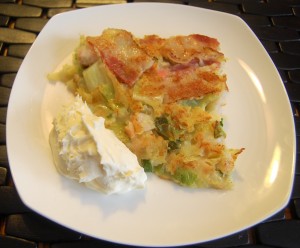
Cut the pancake into slices like a pizza and serve with sour cream:

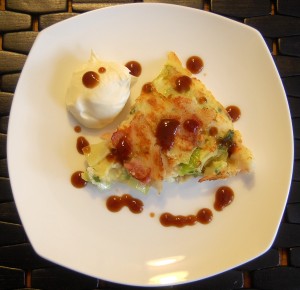
Or with sour cream and okonomiyaki sauce:

Variations

Any number of meats, toppings, and sauces can be added. Some cooks add potato chips to give the pancake a crunchy texture; we tried this once and it didn’t improve the taste, so we don’t recommend including potato chips.

Here is one variation — so easy a dog can do it! Watch how the Yamaimo releases its sticky fluid when grated:

Conclusion

Okonomiyaki is delicious, is an Asian street standard, and yet most Americans have never tried it. Asians love pancakes, and you’ll know why after trying this!

Garlic Shrimp

When we want a dinner that’s easy and fast to cook, we often turn to shrimp. Here’s a typical shrimp dinner.

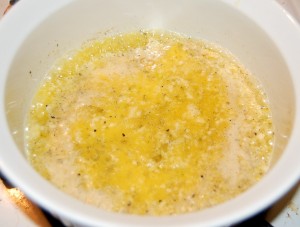
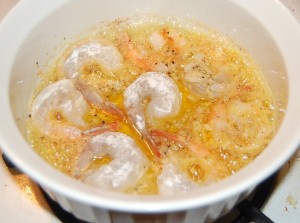
We’ve been cooking a lot with ceramic stoneware as it is easy to clean and won’t release any toxins into food. We start by warming the pot under medium heat and adding 2/3 stick butter, 3-4 crushed garlic cloves, and salt and pepper:

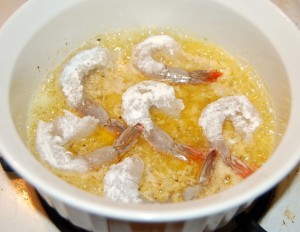
The shrimp should be thawed, cleaned and patted dry. Although it’s not necessary, we coated them in a homemade gluten-free flour (rice flour, potato starch, and tapioca starch).

As with our Pan-Seared Scallops, we recommend adding them individually to the pan so that you can keep the butter hot and sear the shrimp’s surface.

It doesn’t take long to sear the surface – about 1 minute per side on medium heat. Here we’ve flipped three of the shrimp:

The advantage of searing and brief cooking is that the shrimp will retain water and be plump and juicy. Overcooking makes them dry and tough. As with most meats, for health purposes it is enough to cook the surface, where the germs are.

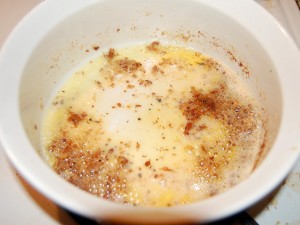
Continue multiple rounds of cooking until all the shrimp are done. When you’re done with the shrimp, there will be oil and garlic in the pan which you can use to cook a vegetable. Here’s our pan:

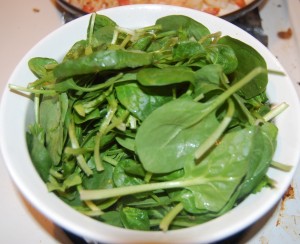
To which we added spinach:

The spinach loses a lot of volume as it cooks. Soon after adding the spinach, you can turn the heat off or down very low because the ceramic pot retains heat for some time.

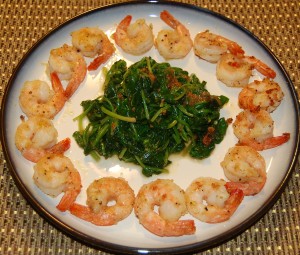
Here is how the spinach and shrimp look when served:

Add in boiled potatoes with butter or sour cream, and you’ve got an easy and nourishing PHD meal!

Hilary Finch Hutler on How PHD Simplifies Cooking: Four Beef Variations

Some terrific chefs and food bloggers have adopted the Perfect Health Diet. Our Recipes page lists a few of the best. One of them is Portland, Oregon chef Hilary Finch Hutler whose TummyRumblr is a go-to food blog for us. We asked Hilary if she had anything she’d like to share with PHD readers. She said she’d like to explain how PHD has simplified her home cooking. Here’s Hilary!

When I started following the Perfect Health Diet a year ago, I was a little worried that I wouldn’t be able to keep up with preparing meals which seemed to be more demanding of my time. Learning to cook new cuts of meat as well as organ meats and more than doubling my seafood and shellfish consumption felt like a lot to take on. But I knew that I was experiencing inflammation-based health problems, and I knew that getting control of them would be valuable for my long-term health, and so I dove in.

Today, with a year of experience under my belt, I’ve found that by following the diet at around 80% compliance, I have gained control of my food and caffeine cravings, I’ve eliminated the horrendous cramps that accompanied my periods for over ten years, and I’ve dramatically reduced my knee pain, frequent bloating, and subsequent low moods. And all of this has been achieved by spending less time cooking (and less time thinking about cooking) than I spent before beginning the diet.

So how exactly has PHD simplified my cooking? Simply put, it’s because PHD is truly a back-to-basics diet. Firstly, the diet allows me to freely eat eggs and fattier cuts of meat or seafood every day. Not only are all of these things easy to cook, they are incredibly satiating, so there’s no feeling snacky or grumpy or any of those other “not quite satisfied” feelings that come with a Standard American Diet or a reduced fat diet.

Many of the foods I now regularly consume on PHD are foods that I limited or avoided for years for fear they would negatively affect my cholesterol or cause me to gain weight. Now that I’m eating these foods on a daily or weekly basis and have only seen improvements in my health, I feel happy and satisfied. I no longer feel the learned guilt that I previously associated with eating “too many eggs” in a week, or when choosing the steak instead of the chicken, or when enjoying heavy cream in my coffee or tea. I see PHD as an eating template, and I know that each day I’ll consume 2-3 eggs, some fermented vegetables or full-fat yogurt, some fatty meat or seafood, a few servings of “safe starch”, and as many colorful vegetables as I can.

Breakfast is a breeze now that eggs are on the daily menu, and lunch is usually either leftovers, canned fish with rice and kimchi, or a simple soup made using bone broth (I make a large pot of bone broth once every 2-3 weeks). For dinner each week I use the PHD diet template as a guide. Seafood at least twice a week is always my goal, and I choose nutrient-rich salmon, black cod, mussels, clams, or oysters. Fatty red meat is 3 – 4 times per week. I enjoy both beef and lamb nearly every week and pork or poultry somewhat more limitedly.

Generally, the fattier cuts of meat recommended on the diet are best cooked by braising or roasting, and these techniques happen to lend themselves particularly well to large-batch cooking and freezing. Every Sunday I braise or roast five pounds of meat, which I freeze in roughly 16 oz. portions for my husband and myself. By making this a ritual, I now have several portions of different types of meat at the ready for simple dinners, and I find that each portion of meat yields plenty of leftovers for a lunch for the two of us.

By learning these large-batch techniques for meat, you’ll find that you can create multiple, unique meals from one simple base recipe. Here, I’ll walk you through the process of a basic pot roast, and then offer up three non-repetitive options using the resulting tender meat to use down the road. I hope you’ll try it!

Basic Pot Roast

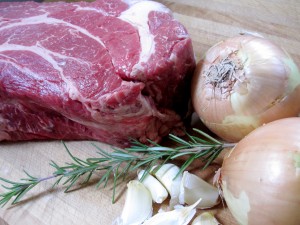
  • One 5 pound boneless chuck roast
  • Salt & pepper
  • 3 – 4 Tbsp. ghee or other fat for browning
  • 2 medium yellow onions, medium dice
  • 5 – 6 large cloves garlic, sliced
  • 2 Tbsp. tomato paste
  • 3 C. water, broth, wine, or a mix (I used 1 C. dry white wine and 2 C. water)

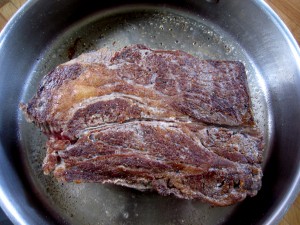
Preheat the oven to 300 degrees. Heat a large dutch oven or other pan large enough to hold the roast over medium heat (you will need a lid). Season the roast liberally with salt and pepper on all surfaces. Add the ghee to the hot pan and allow to melt.  Place the roast into the hot pan and allow to brown lightly, undisturbed, for 3 – 4 minutes. Turn the roast over and brown on the second side. Remove from the pan and set aside on a plate.

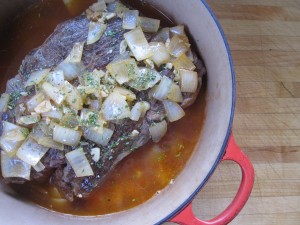
To the same pan, add the onions and the sliced garlic and sauté for 4 – 5 minutes until softened and starting to brown lightly. Next, add the tomato paste and stir until well combined with the onions. Lastly, return the roast to the pan along with any juices that have accumulated on the plate and pour over the three cups liquid. The liquid should cover the roast about halfway (add more if necessary).

Bring the liquid to a boil, cover the pot and transfer to the 300 degree oven for 3½ to 4 hours. Check the roast once an hour to be sure the liquid is bubbling moderately (if it’s simmering so hard it splatters you, it’s too hot – if it’s just occasionally bubbling, it’s too cool). Alter your oven temperature by 25 degrees either way to achieve a moderate bubble.

When the meat is done, remove it from the oven, uncover and allow to cool slightly.  In the meantime, you can prep the ingredients for recipe number one below.

Once the dish has cooled slightly, divide the meat into 4 about-equal portions. Place three in the fridge to cool, spooning a few tablespoons of sauce over each so that they stay moist.  Leave the remaining sauce in the pan and set the last portion of beef aside for the following recipe:

NOTE: All of the following recipes made 4 servings – two larger dinner portions and two slightly smaller lunch portions.

Variation #1: Italian Pot Roast with Braised Cabbage and Roasted Potatoes

  • 1 pound of your favorite roasting potatoes, cut into similarly-sized chunks
  • ¼ cup olive oil or other melted fat of your choice
  • Salt and pepper

Increase the oven temperature to 325ºF. Place the potatoes on a baking sheet and toss with the oil, salt, and pepper. Roast until soft, about 50 minutes.

  • 1 pound pot roast PLUS remaining sauce (see above)
  • 1 tbsp. sherry vinegar
  • 1 small sprig rosemary, leaves stripped and chopped
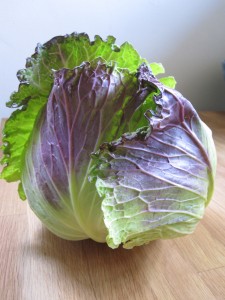
  • ½ large head of savoy cabbage, cut into large chunks
  • Salt and pepper

Add the vinegar, rosemary, and cabbage to the remaining sauce and bring to a simmer over medium heat. Stir to combine, cover, and cook for 30 minutes or until the cabbage is very soft. Stir occasionally to prevent sticking and lower the heat if necessary.

When the cabbage has cooked down, season to taste with S & P. Break your pound of pot roast into 5 or 6 nice chunks and return to the pot.  Stir, cover and continue to cook for 10 minutes more until the meat is thoroughly warmed through.

Serve the braised beef and cabbage with the roasted potatoes.

Variation #2: Braised Beef Tacos with Fried Plantains

  • 1 pound pot roast (see above), defrosted if necessary
  • 1 tsp. cumin
  • 2 tsp. chili powder

For serving:

  • 8 – 10 lettuce leaves, salsa, grated cheese and/or sour cream

Warm the meat and spices, covered, over medium-low heat until simmering. Stir occasionally to prevent burning. Once hot, reduce the heat to the lowest setting and keep covered while you fry your plantains.

For the plantains:

  • 1 green or yellow-green plantain per person
  • coconut oil for frying
  • salt

Peel the plantains by cutting off the ends and running a paring knife down the ridges in the peel just to the depth of the plantain (I think slicing it in three places is ideal). Start at one end and gently pull the peel away from the plantain in segments to expose it. Use your paring knife to remove any bits of peel that remain attached to the plantain.

Heat the coconut oil in a wide saute pan over medium heat. Be sure when the oil melts there is enough to coat the bottom of your pan to a depth of at least ¼ inch. Slice the plantains into approximately 1/3 inch slices at a 45 degree angle so that the resulting pieces are oval in shape. Once the oil is hot, place a single layer of plantain slices into the pan and allow them to cook, undisturbed, for 4 – 5 minutes or until lightly browned. Turn the pieces over (I find a fork works best) and continue to cook until browned on the second side. Transfer to a plate or bowl and immediately season with salt. Continue until all of your plantain sliced have been fried.

Assemble to tacos in the lettuce leaves and serve the plantains alongside. I love these fried plantains dipped a vinegar-y hot sauce like Tapatio. Add a simple salad of sliced tomatoes, red onions, and avocado to make a complete meal.

Variation #3: Beef Fried Rice with Kimchi

  • 1 pound pot roast (see above)
  • 2 Tbsp. coconut oil
  • 1 bunch scallions, thinly sliced
  • 1 red bell pepper, diced
  • 2 tsp. minced garlic
  • 2 tsp. minced ginger
  • 4 cups cooked and cooled rice
  • 2 tsp. fish sauce (or more if you like!)
  • your favorite kimchi
  • pea shoots (optional)

Break your pot roast into 3 or 4 large chunks and place into a large wok or wide sauté pan over medium heat.  Allow to cook, turning occasionally, until the liquid and fat has melted out and the meat is very warm.  Remove the meat from the pan and add the coconut oil to the pan. While the coconut oil melts, quickly chop the beef into bite-sized pieces and set aside.

Sauté or stir-fry the red pepper, scallions, ginger, and garlic in the coconut oil and beef fat until very soft, about 2 minutes. Add the rice to the pan and sauté or stir-fry for several more minutes or until the ingredients are thoroughly mixed and the rice is hot. Return the beef chunks to the pan along with the fish sauce and kimchi and cook until just heated through.

I love this dish served with a handful of fresh pea shoots piled on top.

Pan-Seared Scallops

Scallops are probably our favorite seafood. Living in Boston, we’re fortunate to have access to fresh scallops at reasonable prices most of the year.

One nice aspect of scallops is that they can be cooked very quickly. In fact, they do not need cooking at all – they can be eaten raw – but it is generally a good precaution to cook the surface, where bacteria are most likely to be present. Thus, seared scallops.

We make them two ways, with and without a flour coating, for a slightly different taste.

Classic Seared Scallops

The main trick to cooking scallops is preventing water from escaping the flesh. With loss of water, scallops become smaller and tougher and much less pleasant to eat.

The classic way to keep the water in is to sear the scallops at high heat. To achieve this, the surface of the scallops must be dry. (If the surface is wet, the water with its high heat capacity will prevent the surface from reaching high temperatures before the interior of the scallop has warmed enough to release its water.)

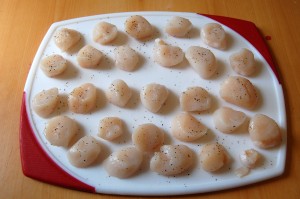
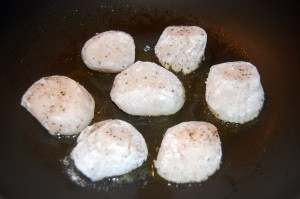
So pat your scallops thoroughly dry with paper towels, then season them with salt and pepper:

Warm the pan to high temperatures, and add oil; we prefer ghee (clarified butter) or beef tallow. Olive oil can also work. If you use butter, which has water, then you should heat the butter long enough that its water evaporates before adding scallops.

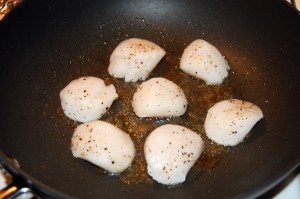
When the hot oiled pan is ready, place the scallops in the pan with space between each.

The reason for spacing the scallops is to maintain a high temperature at the scallop surface. If the scallops are too close together, they will cool the pan and prevent the surface from being properly seared.

The above pictures shows a minimal amount of oil. You can use more oil – as much as 3-4 tablespoons – which will cook the scallops faster.

The ideal pan temperature is the lowest temperature at which water doesn’t accumulate in the pan. Water released from the scallops should immediately turn to steam, so you see no liquid water, but this evaporation will prevent the scallops from burning. With a little practice you’ll find the right temperature; on our gas stove it is a medium-high heat.

It typically takes about a minute and a half to sear one side of the scallop. After 90 seconds, flip the scallop over and sear the other side for 90 seconds. You can also turn them on their side briefly to sear the sides.

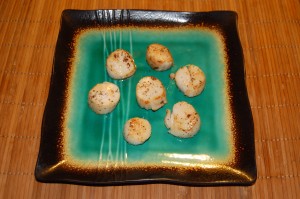
Remove them from the pan and serve:

Crispy Seared Scallops

For a slightly different flavor, lightly coat the scallops in a safe starch flour (rice flour, potato starch, tapioca starch, or mixture) as well as salt and pepper.

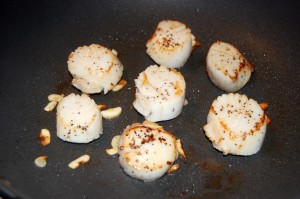
You can add sliced garlic or other flavoring vegetables to the oil to alter the flavor; the flour coating will pick up flavors from the oil.

Typically the flour-coated scallops will retain water better and the flour will burn more easily, so they should be cooked at a lower temperature for a bit longer – say 2 minutes per side at a medium setting on our stove.

Dipping Sauce

Once they are done, remove and make a dipping sauce. The recipe for PHD sauces is:

  • Oil – such as olive oil.
  • Acid – such as rice vinegar, lemon juice, or lime juice.
  • Flavorings – such as mustard, salt, pepper, or herbs.

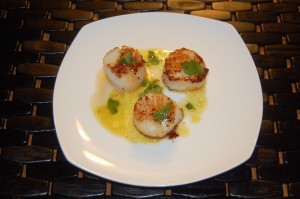
Here we made a sauce from olive oil, rice vinegar, mustard, salt, pepper, and cilantro, and drizzled it over the scallops:

Conclusion

Because they are barely cooked, almost raw inside, time from refrigerator to dining table can be as little as 10 to 15 minutes. Serve with a safe starch and vegetable, and you have a complete meal.

Here are a few other perspectives on scallops. Here is Ming Tsai, a chef from suburban Boston:

And here’s Chef John from FoodWishes.com. His sauce is the same as ours, but with jalapeno and orange slices added: