Yearly Archives: 2011

Bengali Fish Curry (Machher Jhal), 2: The Recipe

Dr. Shilpi Bhadra Mehta is a Doctor of Optometry, a Board Member of the Archaeological Institute of America, and leader of the Boston Paleo group, Living Paleo in Boston. I asked her to tell us about Indian cuisine, and she offered a discussion of Bengali Fish Curry. We’re doing it in two parts: first, a discussion of its health benefits; second, a recipe with pictures. — Paul

This recipe for Bengali Fish Curry provides 6-8 servings. It will be good up to 5 days in the fridge after cooking. Keep the skin on the fish if it’s wild!

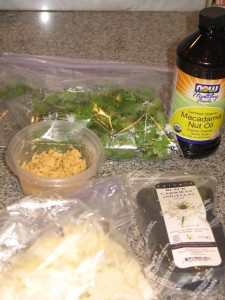
Ingredients

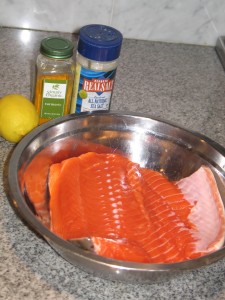
2 pounds fillet or steak of wild fish with skin-in (preferably a high Omega 3 fish like salmon)

1 Large Onion, diced or sliced

3 Tablespoons Ginger Paste (Don’t use if taking warfarin, blood thinners, or have gallstones)

2 Teaspoons Kalo Jeera/Kalonji/Nigella Seeds (available in South Asian grocery stores)

Macadamia Nut Oil

Turmeric powder

Juice of Half a Lemon or 1 Small Lime

1 Cup chopped fresh Cilantro

1 Teaspoon Sea Salt (more can be added to taste by the individual)

Optional:

2 medium Vine Ripe Tomatoes, chopped

1 Green Chili Pepper

1 Teaspoon Red Chili Powder/Cayenne /(Paprika for less heat)

Preparation:

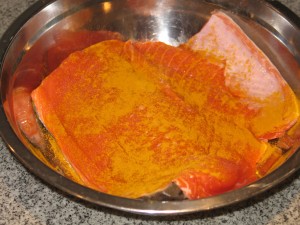
Sprinkle turmeric and salt lightly over both sides of the fish (but not the side with skin if your fish has it). Squeeze the juice of half a lemon/lime on the fish (but not the side with skin if your fish has it). Let it marinate on the counter for 15 minutes, or longer in the fridge for up to 2 days.

Sautéing the Fish:

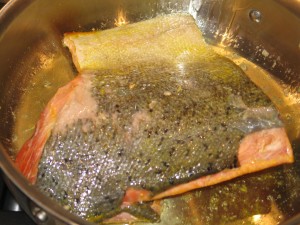
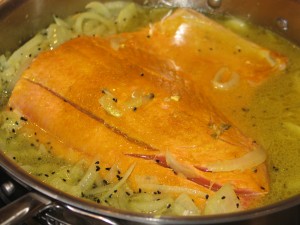
1) Heat oil in a pan at medium to medium-high heat (depending on your stove). The oil should be sizzling but not smoking. If oil is too cool or the pan gets dry then the fish might break or stick to the pan. Slide fish pieces carefully into hot oil, in a single layer placing them flat.

2) Sauté fish about 2 min to a light brown on each side and flip only once. Do not fry to a dark brown, or they can become stiff and chewy. Then set the fish pieces on a plate.

Making the Sauce/Curry:

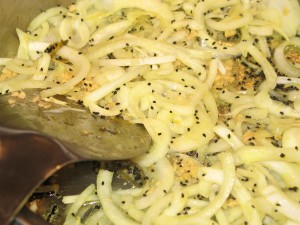
1) Heat the remaining oil in the pan to the same temperature as before. Add more oil if necessary – do not let your pan get dry or the fish will stick! Add the Nigella/Kalonji seeds.

2) When the seeds sizzle, add the onion in and fry for 2 – 3 minutes till they get translucent.

3) Stir in the chili, tomato and the ginger, and continue to cook about another 3-5 minutes till the tomatoes become soft and start to break up.

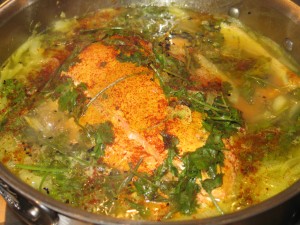
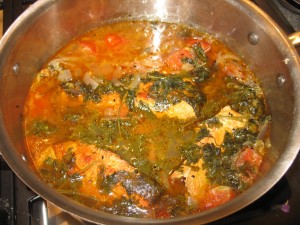
4) Pour in about 2 cups water, and return fish to pan and place them in a single layer, with the skin surface touching the pan. Add fresh cilantro, cover the pan, turn down heat and let simmer for about 10-15 minutes until fish is cooked, and then turn off heat.

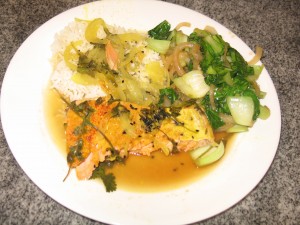
5) Enjoy with rice cooked in butter or ghee (you can top with ghee or butter, too) and a vegetable of choice (in this case it was bok choy) for a Perfect Health meal!

Chicken, Shrimp, and Egg Salad

This is a simple dish which Shou-Ching’s father used to make for them as children. It can use almost any meat – whatever you have handy. And it cooks in only a few minutes.

Eggs are always worth including. Cook some eggs in a wok at low heat with a healthy oil (we used butter, olive oil or coconut oil will do):

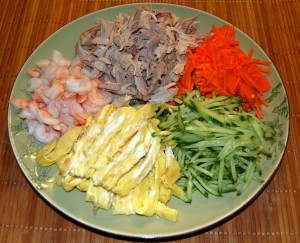
We added pre-cooked shrimp, and some shredded chicken meat left over from a chicken soup. With shredded carrot and cucumber, it was served like this:

Next you need a sauce. Ours was made by mixing:

  • 3 tbsp rice vinegar
  • 1 tsp Dijon mustard
  • 2 garlic cloves, crushed
  • Salt and pepper
  • 4 tbsp olive oil
  • 1 tbsp almond butter (or crushed nuts, or nut butter of your choice)
  • Optional: a few drops of soy sauce and sesame oil

The sauce is crucial for the dish; we consider rice vinegar and Dijon mustard essential. If you are serving children, add a little sweetness to the sauce with some rice syrup or diced fruit.

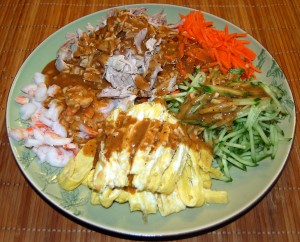
Drizzle the sauce over the food:

By the way, this is a good sauce also for any “safe starches” you may include in your meal. As discussed in “How to Minimize Hyperglycemic Toxicity,” Oct 20, 2011, mixing vinegar and fats or oils with starches will reduce their impact on blood glucose levels.

Serve the chicken, shrimp, and egg salad with white rice, Homemade Seasoned Seaweed (Jan 9, 2011) or Fermented Mixed Vegetables (Nov 27, 2011), and you have a complete meal in a traditional style of Asian home cooking. Don’t be shy to mix all the food together!
Pork Spare Ribs

The holidays are a great time for finger-food. There must be a reason why pigs have ribs: I think it was so that our fingers could hold that fatty rib meat at Christmas.

Our recipe for Pork Spare Ribs is essentially the same as the one for Chicken Wings (Sep 19, 2011) – another great recipe for buffet-style family gatherings. It goes like this.

Preparing the Spare Ribs

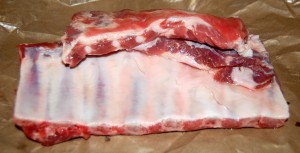
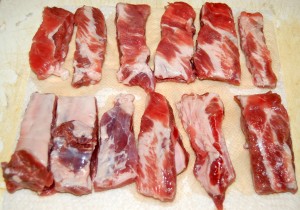
A rack of spare ribs looks like this:

Use a pair of kitchen shears or scissors to cut between the rib bones:

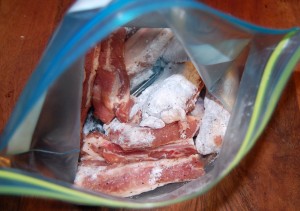
Wash the ribs and pat them dry. Just as in the Chicken Wings recipe, put ¼ cup potato starch in a plastic bag with salt and pepper, and shake the dried ribs until they’re evenly coated.

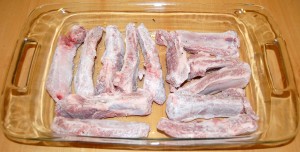
Lay them out in an oven-safe baking dish:

Cook for 20 minutes at 350ºF (177ºC), then turn the ribs over and cook for another 20 minutes. They’ll come out like this:

Preparing the Sauce

Many flavors of sauce are possible. The Chicken Wings post discusses Garlic, Parmesan and Mustard Sauce; Buffalo Style Spicy Sauce; and Pacific Sweet and Sour Sauce. Here’s a fourth sauce, an Asian style sauce.

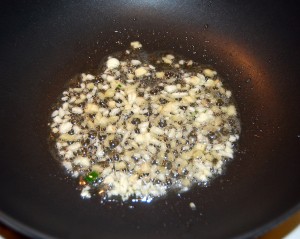
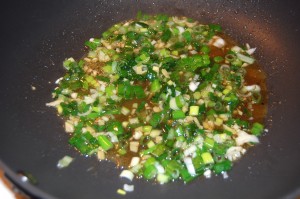
Heat diced garlic, ginger, and scallions in a bit of beef tallow or other healthy cooking oil. Cook the garlic and ginger first for 2 minutes at medium heat, then add scallions:

Quickly add the premixed wet ingredients: 2 tbsp rice vinegar, 1 tbsp brown rice syrup, 1 tsp gluten-free soy sauce, and salt and pepper to taste. (Don’t substitute other vinegars for the rice vinegar.) Then mix in the cooked ribs and stir until they’re thoroughly coated.

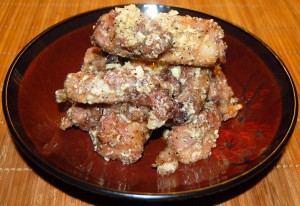
Set them on a serving plate:

Here are ribs made with Garlic, Parmesan and Mustard sauce:

Here are ribs made with Buffalo Style Spicy Sauce:

Enjoy!

Fermented Mixed Vegetables

We’ve been eating a lot of fermented vegetables lately. We started with kimchi (Homemade Kimchi, Jun 26, 2011), but lately we’ve been fermenting our vegetables in a less spicy style that is normally used for sauerkraut.

Sauerkraut” means “sour cabbage.” We are not huge cabbage fans, so we often substitute other vegetables. We’ve had good results from Daikon radish, red radish, carrot, celery, and cabbage; the only vegetable we didn’t care for was parsnip.

This is a really simple procedure – mix salt, water, and vegetables with a few spices; leave in a cool, dark sealed container for 7-10 days; eat.

For safety, the key is to give enough time for the water to become acidic. Wikipedia explains the evolution of the bacterial population:

The fermentation process has three phases. In the first phase, anaerobic bacteria such as Klebsiella and Enterobacter lead the fermentation, and begin producing an acidic environment that favours later bacteria. The second phase starts as the acid levels become too high for many bacteria, and Leuconostoc mesenteroides and other Leuconostoc spp. take dominance. In the third phase, various Lactobacillus species, including L. brevis and L. plantarum, ferment any remaining sugars, further lowering the pH. There are unpasteurized sauerkrauts on the market. Properly cured sauerkraut is sufficiently acidic to prevent a favorable environment for the growth of Clostridium botulinum, the toxins of which cause botulism.

Klebsiella and Enterobacter are potentially pathogenic bacteria, but the later Leuconostoc and Lactobacillus species are probiotic. So the more acidic the water, the better the mix of bacteria.

Another good tactic is use predominantly low-calorie vegetables. Keeping sugar levels low will help keep the yeast population down.

First Batch: Daikon radish, celery, carrot

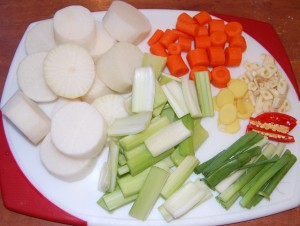
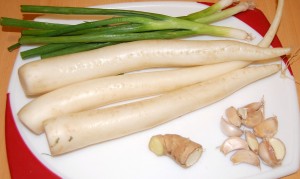
Here were the raw materials for one batch:

We could have cut the white Daikon radish pieces smaller, but this size did fine: by day 7 they were softened all the way through.

Sea salt, ginger, garlic, and peppercorn are seasonings we consider essential; green onion and red pepper have worked for us as well.

You’ll need a large glass or ceramic container that seals. If it is glass, keep it in a dark cabinet while fermenting to avoid light exposure. We like to look at ours in progress, so we bought glass containers.

Fill the glass container about 80% full with diced vegetables, then cover with water so the container is 90% full. Add enough sea salt that the water tastes salty, but not undrinkably so. Also add the other seasonings – ginger, garlic, peppercorn, and any others you choose.

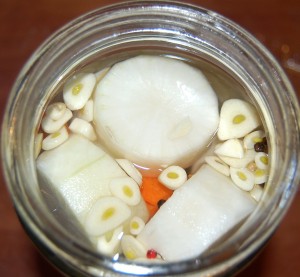
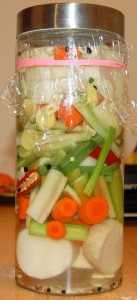
The container will now look like this:

Now it has to be covered with an air-tight seal. We placed plastic wrap over the top, wrapped a rubber band around the jar, and then sealed the lid over the wrap:

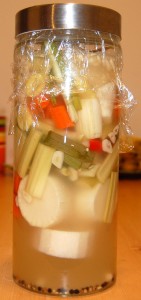
After a week it will look like this:

Note how cloudy the water has become.

After a week you should be able to start removing vegetables to eat. Here are some vegetables:

It’s also a good idea to remove the cloudy fluid and drink it. This makes a great “soup” or beverage along with your meal.

As you remove fluid, add water and sea salt to replace what you took. When you run out of vegetables, add a new batch of diced vegetables to the old fluid and let it ferment for a week.

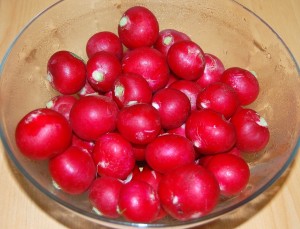
Second Batch: Daikon radish, green onion, and red radish

This first try was so successful we bought a larger glass container and made another batch, this time including red radish. Ingredients:

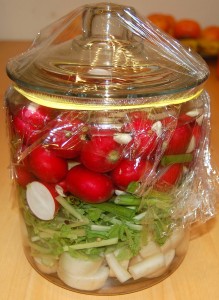
Here it is ready to go into a dark cabinet for fermentation:

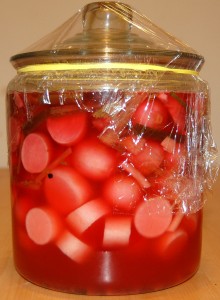
And here it is a week later:

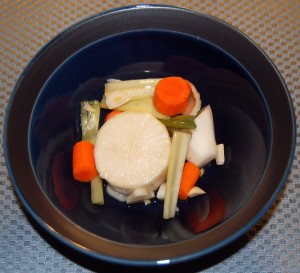
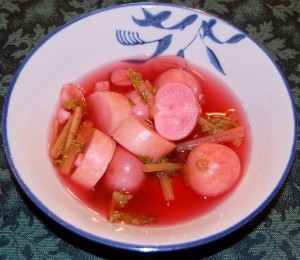
All the red skin pigment has come off the radishes and into the fluid. Here is a bowl of vegetables and fluid:

We’ve been eating two bowls a day, one at dinner and the other at breakfast or lunch.

Other Tips

Try to keep the fermentation jar sterile. We replace the wrap every time we open the container, and keep the lid region dry at all times: if any fluid spills on it as we take vegetables out, we dry the top of the jar with a paper towel. (Bacteria need moisture to thrive.)

If you have concerns about the bacteria on your vegetables, sprinkle salt over them and let them sit for a bit, then rinse the vegetables before dicing them and adding them to the container. This salting will help sterilize the surface a bit.

Conclusion

Even if you don’t like vegetables, you’ll probably like this. Fermented vegetables are surprisingly tasty. Moreover, the fluid is also very tasty. It makes a healthful hydrating beverage, and a great accompaniment to a meal; the acidic fluid helps clear the palate and improve the taste of foods.

We couldn’t be happier with our vegetable fermentation. It makes vegetables taste great, provides us with helpful probiotic flora and lactic acid, and is exceptionally easy to prepare. No cooking necessary!